
𝐌𝐲𝐒𝐐𝐋 𝐈𝐧𝐬𝐭𝐚𝐥𝐥𝐚𝐭𝐢𝐨𝐧
MySQL Installation: 𝐀 𝐒𝐭𝐞𝐩-𝐛𝐲-𝐒𝐭𝐞𝐩 𝐆𝐮𝐢𝐝𝐞
Introduction
MySQL Workbench is a versatile, cross-platform software powered by Oracle, designed for MySQL database development. As an open-source, fast, reliable, and highly scalable database management system, it stands out as an essential tool for database administrators and developers.
What is MySQL?
MySQL is a widely-used Relational Database Management System (RDBMS) that employs Structured Query Language (SQL) to manage databases. It organizes data into tables that can be easily modified using SQL. MySQL’s compatibility with various operating systems, including Windows, Linux, macOS, and Ubuntu, makes it a preferred choice for many users.
Why Choose MySQL?
- Open Source: MySQL is free to use, eliminating any financial barriers to access.
- Cross-Platform: MySQL operates seamlessly on multiple operating systems such as Windows, Linux, and Unix.
- High Availability: MySQL’s robust processing capabilities handle bulk queries and transactions efficiently while maintaining unique memory caches.
- Reliability: Secure connections are ensured through SSH and SSL, with features like data encryption and backup for recovery.
What is MySQL Workbench?
MySQL Workbench is a comprehensive software suite that enhances SQL development. It provides tools for data modeling, SQL development, and various administrative tasks, all within a user-friendly graphical interface. This unified software streamlines database management, making it more accessible and efficient.

How to Install MySQL Workbench
Follow these steps to install MySQL Workbench on Windows. The process is similar for other operating systems.
- Open a browser and navigate to the MySQL website: MySQL Downloads
- Select the “Downloads” option.

3. Click on “MySQL Community (GPL) Downloads.
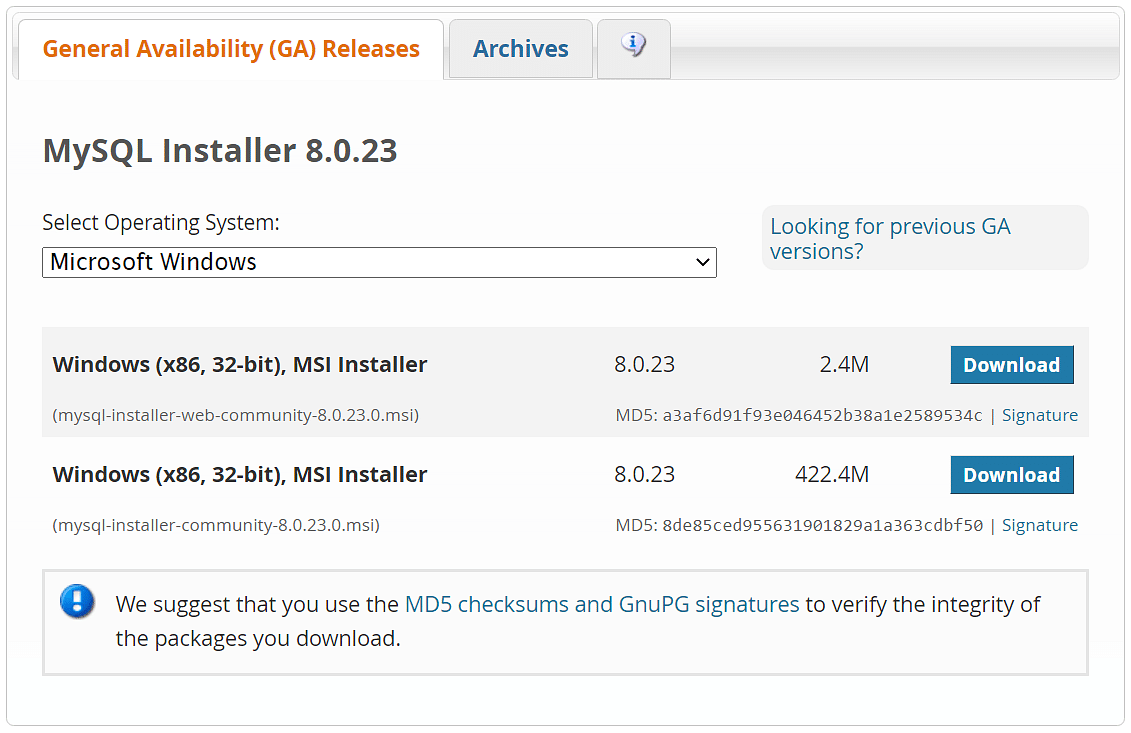
4. Choose “MySQL Installer for Windows.

5. Download the desired installer: For instance for version 8.0.38.0, mysql-installer-web-community-8.0.38.0.msi or mysql-installer-community-8.0.38.0.msi.
6. After downloading, open the installer.
7. When prompted for permission, click “Yes” to proceed. The installer will open and ask you to choose the setup type. Select “Custom.”
8. Open “MySQL Servers,” select the server to install, and move it to the “Products/Features to be installed” section.
9. Expand “Applications,” choose “MySQL Workbench” and “MySQL Shell,” and move them to “Products/Features to be installed.”
10. Click “Next,” then click “Execute” to download and install the MySQL server, Workbench, and Shell.
11. Once ready to configure, click “Next.” Under “Type and Networking,” use the default settings and select “Next.”
12. For authentication, use the recommended strong password encryption.
13. Set your MySQL Root password and click “Next.”
14. Use the default Windows service settings and under “Apply Configuration,” click “Execute.” Once complete, click “Finish.”
15. Complete the installation, launching MySQL Workbench and Shell.
16. After installation, select the local instance and enter the password.
You can now use the MySQL query tab to write your SQL queries.


Connecting MySQL Workbench to VS Code
For more efficient querying, connect MySQL Workbench to VS Code using Weijan Chen's MySQL client. This setup allows you to better manage and execute .sql script files directly within your code editor.


Conclusion
By following this step-by-step guide, you will have MySQL Workbench up and running efficiently, providing a robust platform for your database management and development needs.
For comprehensive data analysis, consider enrolling in our classes. We offer detailed instruction on Excel, Power BI, MySQL, data visualization, and much more. Contact us via phone, email, or chat for admission information. We run online and onsite classes at affordable prices.
Our courses are designed to enhance your data management skills and empower you with the tools needed for efficient database development and analysis.
Created at: Sun Jul 14 2024
Updated at: Mon Jul 15 2024